Montessori Activity Trays: A Guide to Creating Them at Home for Expat Families

Activity trays are the tool that turns any table into a space of concentration and discovery for children. At IMS Sotogrande, we use them every day in our Nido and Children’s House classrooms because they provide structure for independent work and respect each child’s pace. If you want to replicate this resource at home, here is a complete guide with real examples. In this article we explore Montessori activity trays at home in depth with practical examples.
Key Points
- Each tray contains ONE complete activity with all its materials.
- The child chooses the tray, carries it to their workspace, and returns it when finished.
- You don’t need to buy anything special: everyday objects work just as well.
- Trays develop motor coordination, concentration, and autonomy from 12 months old.

What Exactly Are Montessori Activity Trays
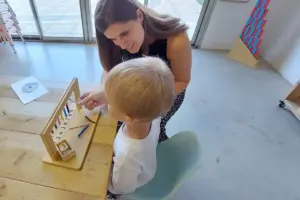
An activity tray is a container (metal, plastic, or wood) that holds everything needed to complete a specific task. The child picks it up from the shelf, carries it to a table or rug, works with it, and returns it when done. This complete sequence is the invisible lesson: order, responsibility, and completion of processes. When it comes to Montessori activity trays at home, it pays to listen to what families and lead guides actually report.
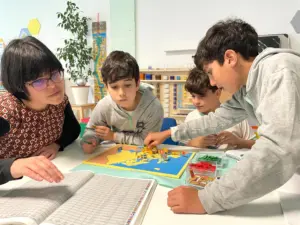
In the Montessori method, the tray replaces open-ended toys without a clear purpose. It’s not that free play disappears, but that each tray offers a specific challenge adapted to the child’s developmental level. That’s why in our Nido (0-3 years) the trays contain transfer and fitting activities, while in the Children’s House (3-6 years) they incorporate practical life, sensorial, and pre-reading skills. Daily practice with Montessori activity trays at home reveals nuances no handbook fully captures.
Montessori Materials and Their Internal Logic
Each material within the tray has a single objective: pour water from one jug to another, thread large beads, sort buttons by color. If you mix several objectives in one tray, the child gets distracted and fails to master any skill. The golden rule is: one tray, one challenge, one presentation. Understanding Montessori activity trays at home from inside the classroom reshapes everyday decisions.

How to Create Montessori Activity Trays at Home Step by Step
Preparing activity trays at home doesn’t require a big budget. The important thing is to think like a Montessori guide: observe what interests your child now and offer them a material that presents an achievable challenge.
Choose the Right Tray
Plastic trays with low edges work well for the youngest children because they are lightweight and easy to grip. For older children, wood or metal trays add weight and stability. The ideal size allows all materials to fit without crowding but without extra space that invites adding unnecessary objects.
Prepare One Activity per Tray
This is the step that makes the difference. If your 2-year-old is practicing transferring, place two small bowls and a spoon with dry lentils in the tray. Nothing more. If your 4-year-old is working on clothespins, include a tray with colored clothespins and a container to place them in. No distracting extras.
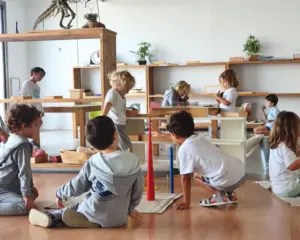
Organize Trays on an Open Shelf
Activity trays need a fixed, accessible place. A low shelf with three or four trays in view is sufficient. The child should be able to see them, choose, and return them without adult help. At IMS, we work with shelves at their height in each classroom. At home, a living room shelf or a bedroom cabinet serves the same purpose.
Book a personalized school visit and discover how we organize the prepared environments in Nido and Children’s House.

Montessori Activity Trays by Age: Concrete Examples
Trays change according to the child’s developmental plane. A 15-month-old baby is not the same as a 5-year-old child, even though both use the same resource.
From 12 to 24 Months: Sensory Exploration
At this stage, trays contain materials that can be touched, transferred, and fitted. Examples: a tray with a bowl of dry rice and a small spoon to move it; a tray with large shape-sorting pieces; a tray with a sponge and two containers for wetting and squeezing.
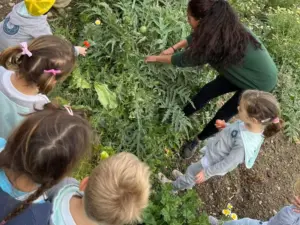
From 2 to 4 Years: Practical Life
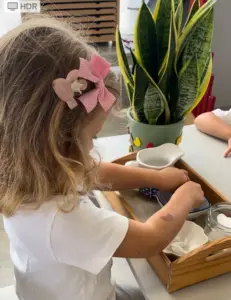
Here the trays gain complexity and reflect real household tasks. A tray with a small vase, a bowl with water, and a silk flower to place and remove. A tray with large buttons to button and unbutton a fabric frame. A tray with a pitcher to pour water between two glass cups. In our Children’s House program at IMS Sotogrande, these activities are part of daily life.
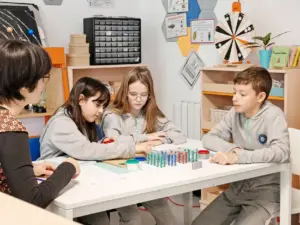
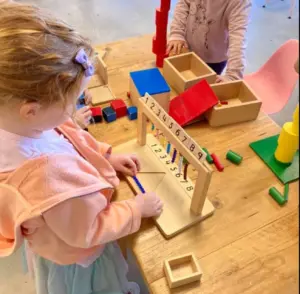
From 4 to 6 Years: Sensorial and Pre-Reading
Trays include sensory classifications (colors, sizes, textures) and language activities like matching objects to word cards. A tray with three bowls and objects of three different sizes to sort. A tray with sandpaper letters and a small chalkboard for tracing. A tray with beads for stringing following a color pattern.
Common Mistakes When Preparing Montessori Activity Trays
The most common mistake is overloading the tray. If you put in ten pieces when the child only needs three, the activity loses focus and the child loses patience. Another mistake is presenting materials that are too easy or too difficult: if there isn’t an appropriate challenge, the child gives up or becomes frustrated.
It’s also important not to intervene constantly. The tray is designed for autonomous work. Observe, but let your child solve their own errors. If you see they can’t manage something, offer a brief, silent demonstration, without unnecessary words.
How to Know if the Activity is Appropriate
Your child spontaneously chooses the same tray several times throughout the week: this is a clear sign that the level is correct. If they ignore it, it’s probably above or below their current capacity. Observation is the Montessori guide’s best tool, and you are one at home too.
Frequently Asked Questions
From What Age Can I Introduce Activity Trays?
You can start from 12 months with simple sensory exploration trays. The important thing is that the child can manipulate the materials safely and that the activity doesn’t require constant supervision. As they grow, the complexity increases naturally.
How Many Trays Should I Offer at the Same Time?
Between three and five trays is enough for the child to have real choice without feeling overwhelmed. Place them on an open shelf and rotate them every two or three weeks based on their interest. Too many options lead to distraction rather than freedom.
Can I Use Recycled or Household Materials?
Absolutely. Activity trays don’t require brand-name Montessori materials. A bowl, a spoon, large buttons, clothespins, fabric scraps, and glass jars make complete activities. What matters is not the origin of the material but its pedagogical intention.
What Do I Do If My Child Shows No Interest in the Trays?
First, observe if the level is appropriate: too easy or too difficult. Then check if the environment invites work: a clear table, no screens on, no excessive noise. Sometimes it’s enough to change the location or present the activity yourself calmly to spark their curiosity.
Key Takeaways
Activity trays are the most accessible tool for bringing Montessori pedagogy into your home. With simple materials and an organized shelf, you offer your child a space for concentration and autonomy that respects their developmental pace.
Start with three simple trays this week and observe how your child responds. If you want to see how we use them in the classrooms at IMS Sotogrande, book a personalized visit and discover the prepared environment in action.