How to Set Up a Montessori Shelf at Home: A Step-by-Step Guide for Expats

Setting up a Montessori shelf at home doesn’t require a high budget or a huge space. What it does require is intention: that each object is within the child’s reach, always placed in the same spot, and with a clear purpose. This is how it becomes a tool for true autonomy. In this article we explore Montessori shelf setup in depth with practical examples.
- Key Points
- Place the shelf at your child’s height so they can reach materials without help.
- Offer a few objects at a time, ordered from left to right and from simplest to most complex.
- Each material must have a fixed place; the child returns it when finished.
- Review the shelf every two weeks and rotate materials based on interest and level.
- An open shelf replaces closed drawers and disorganized toy bins.
In the Montessori method, the Montessori shelf is not a decorative piece of furniture. It is the backbone of the prepared environment: a space where the child exercises their freedom within clear limits. When a 3-year-old walks to their shelf, chooses a material, takes it to their table, and returns it when done, they are building concentration, internal order, and respect for their environment. When it comes to Montessori shelf setup, it pays to listen to what families and lead guides actually report.
If you’re thinking about how to start, the first thing to understand is that less is more. You don’t need to fill every shelf. You need what you put out to have meaning. Daily practice with Montessori shelf setup reveals nuances no handbook fully captures.
- What is a Montessori Shelf and Why Does It Work?
- How to Choose the Right Montessori Shelf
- Organizing Materials: The Golden Rule
- Rotation: When and How to Change Materials
- Common Mistakes to Avoid
- The Shelf at Each Stage: Nido, Children’s House, and Elementary
- Frequently Asked Questions
- Key Takeaways
What is a Montessori Shelf and Why Does It Work?
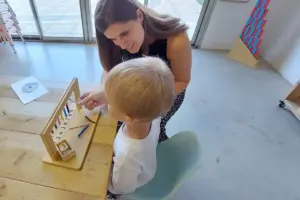
A Montessori shelf is a low piece of furniture with open shelves and no doors, placed at the child’s height. Each shelf holds a single material or a small group of related materials, ordered from left to right. The child sees everything available, chooses freely, and returns each item to its spot when finished. Understanding Montessori shelf setup from inside the classroom reshapes everyday decisions.
The principle is simple: if the child can’t see the material, they can’t choose it; if they can’t reach it, they can’t return it. The shelf eliminates these barriers. It also reduces tantrums, because the child knows exactly what they can do and where everything is. There are no surprises or adult commands: the space speaks for itself. Concrete data on Montessori shelf setup is worth reviewing before acting on assumptions.
Maria Montessori observed that young children have a natural sense of order between the ages of 0 and 6. If the environment is organized, the child feels secure. If it is disorganized, they become restless. The shelf respects this sensitivity by offering a stable framework that the child can maintain with their own hands.
Book a personalized school visit to see how we organize the environments in our Nido and Children’s House classrooms.

How to Choose the Right Montessori Shelf
You don’t need to buy an expensive shelf. The important thing is three features: that it is low (the top shelf within the child’s reach), that it has open shelves (no doors or drawers), and that it is stable (it should not tip over if the child leans on it).
Just the Right Height and Depth
For a child aged 18 months to 3 years, the top shelf should not exceed 60 cm. For one aged 3 to 6 years, between 70 and 90 cm works well. The ideal depth is about 30 cm: enough for a material with its tray, without objects piling up behind.
Material and Stability
Wood is the most common option in Montessori because it conveys warmth and is durable. If you choose a piece of furniture from IKEA or similar, make sure to anchor it to the wall. A child leaning on an unstable shelf can have a serious accident. Safety is non-negotiable.
One Shelf, One Function
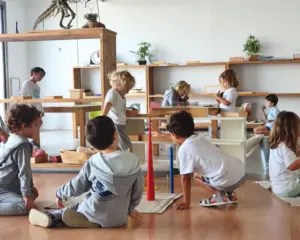
In our Nido and Children’s House at IMS Sotogrande, each shelf groups materials from the same area: practical life, sensorial, language, or mathematics. At home, you can simplify: one shelf for art, another for construction, another for books. The child learns to go to the correct area based on what they want to do.

Organizing Materials: The Golden Rule
Order is not an aesthetic whim. It is what allows the child to be independent. If each material has a fixed place, the child finds it without asking for help and returns it without being reminded.
Left to Right, Simple to Complex
In Montessori, we place materials from left to right, from the simplest to the most challenging. This arrangement follows the natural direction of reading in English and Spanish and reflects the child’s progress. On the left shelf, the material they master easily; on the right, the one that requires more attention.
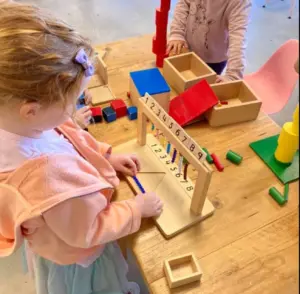
One Tray, One Material
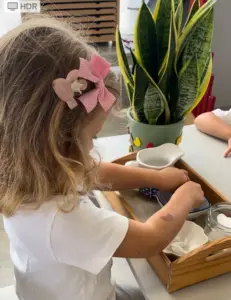
Each activity goes on its own tray or tray with edges. This way the child can carry it complete to their table or mat without losing pieces. In practical life, for example, a tray with a water jug, glass, and sponge. In sensorial, a tray with the three cylinders from a block. Don’t mix activities on the same tray.
Few Choices, Great Depth
Offer between 6 and 10 materials on the shelf, no more. If you put 20 toys, the child doesn’t choose: they wander. If few, they concentrate and repeat. Repetition is the engine of Montessori learning: a 4-year-old may use the same pouring tray 15 times in a row until they master the movement. Give them space for it.

Rotation: When and How to Change Materials
A static shelf becomes ineffective in two weeks. Young children change interests quickly. Rotation keeps the environment alive.
Review the shelf every 10 to 15 days. Remove materials they no longer choose or have completely mastered. Introduce one or two new ones, always placing them in the same type of space. Don’t change everything at once: the child needs continuity.
Observe before removing. Sometimes a child doesn’t choose a material because they don’t know how to use it, not because they’ve surpassed it. If you see them hesitate, present it again with a brief, silent demonstration. In the IMS classrooms, our guides do this every week: they observe, present, and remove when the child is ready.
Common Mistakes to Avoid
The most common mistake is treating the Montessori shelf like a pretty display. If the materials are decorative but the child can’t touch them, it loses all meaning.
Another frequent mistake is mixing materials for very different ages. A shelf with a 2-piece puzzle next to a 6-year-old’s reading game confuses the younger child and frustrates the older one. Separate by level: if you have two children of different ages, assign each shelf (or each shelf space) to one.
It’s also a mistake not to have a cleanup plan. If the child doesn’t return the material, the shelf becomes disorganized in an hour. Teach cleanup from the beginning: “When you’re finished, the tray goes back to its spot.” In a few days, it becomes a habit.
The Shelf at Each Stage: Nido, Children’s House, and Elementary
In the Nido (0-3 years), the shelf contains a few large objects: baskets with real-life objects, a mobile, a tray with a sphere. The baby crawls to it, chooses, and explores. In Children’s House (3-6 years), trays with complete activities appear: pouring, transferring, buttoning, the first sensorial materials.
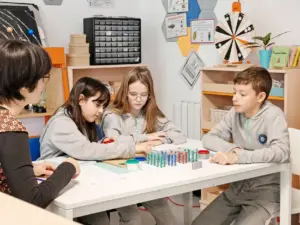
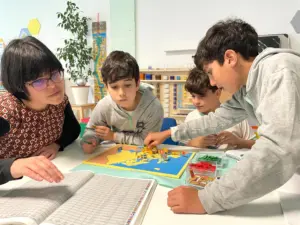
In Elementary (6-12 years), the shelf transforms. It is no longer a piece of furniture with concrete materials: it is a shelf with books, projects, and research. The older child chooses their work, develops it over days, and presents it to the group. The autonomy they built with the pouring tray at age 3 now allows them to design a history presentation or a science experiment.
Frequently Asked Questions
What materials should I put first on a Montessori shelf?
Start with practical life materials: a tray for pouring water, another for transferring with a ladle, one for buttoning. These are real activities, not toys, and develop concentration, fine motor coordination, and autonomy. At age 3, you can add the first sensorial materials, like cube towers or cylinders.
Can I use an IKEA shelf as a Montessori shelf?
Yes, as long as it is low, open, and stable. Models like KALLAX or LACK work well if you anchor them to the wall. The important thing is not the brand but that the child can reach the materials without help and that each object has a fixed place to return it.
How often should I rotate the shelf materials?
Every 10 to 15 days, observe which materials the child chooses and which they ignore. Remove those they no longer use and introduce one or two new ones. Don’t change everything at once: the child needs to see continuity in their environment to feel secure and develop repetition, which is key to learning.
Does a Montessori shelf replace traditional toys?
It’s not about replacing but organizing. Many traditional toys can be placed on the shelf if the child chooses them and returns them. What changes is the presentation: instead of an overflowing drawer, each material is on its tray, visible and accessible. The shelf doesn’t forbid toys; it gives them structure.
Key Takeaways
A well-organized Montessori shelf transforms the daily routine: fewer conflicts over tidying, more spontaneous concentration, a child who feels capable. You don’t need an expensive piece of furniture or an entire room: with a low shelf, a few well-chosen materials, and a fixed place for each, your child begins to develop order, autonomy, and respect for their space.
Start today with a single shelf space: put three materials on trays, show your child where they go, and let them choose. Observe what happens in a week. If you want to see how we organize the environments in our Sotogrande classrooms, book a personalized visit and discover it in person.