Sensory Table Ideas for Kids in Sotogrande: Montessori Activities for Home, Classroom and Garden

Sensory table ideas start with a prepared play space containing materials children can touch, move, fill, empty and combine. In Montessori, this invitation lets children explore with their hands and senses while practising concentration, coordination and independence. From 18 months, it can work well at home with a simple invitation, safe materials and supervision suited to the child’s age.
Key points
- Start with one action, such as pouring, sorting, mixing or kneading.
- Match the size and difficulty of the materials to the child’s age.
- Offer only a few objects to support concentration.
- Observe first and help only when the child needs it.

Sensory table ideas: benefits for child development
This approach supports hand-eye coordination, language, concentration and independence. The child decides what to do, repeats the action and notices what happens, while the adult protects the environment without taking control. When it comes to sensory table ideas, it pays to listen to what families and lead guides actually report.
A sensory table also provides practice with very specific skills. When a child fills a container, they improve movement control. For example, comparing a smooth stone with a piece of cork helps them find words to describe differences. They also learn that their actions produce predictable changes. Daily practice with sensory table ideas reveals nuances no handbook fully captures.
The Association Montessori Internationale provides the international reference framework for Montessori principles and the prepared environment. The American Academy of Pediatrics also brings together general child-safety guidance worth reviewing while a child is still putting objects in their mouth. Understanding sensory table ideas from inside the classroom reshapes everyday decisions.
Montessori sensory table: the environment comes before the materials
The prepared environment matters more than buying a special piece of furniture. Place the container at the child’s height, keep a towel nearby and remove obstacles. This allows the child to start, repeat and finish the activity with less help.
A sensory table works best when the adult presents the material once and then observes. The activity follows the child, not the other way around. If the child spills, guide them with a short phrase and let them clean up.
Sensory tray for ages 0-3
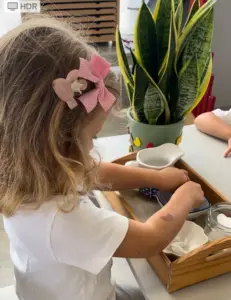
For children under 3, a sensory tray should prioritise large, washable objects that are easy to grasp, such as water, sponges, fabrics, containers and sturdy spoons. A simple sensory tray offers more safety than an invitation filled with small pieces.
At 18 months, limit the invitation to one or two actions and stay close. However, do not leave rice, chickpeas, lentils, marbles or small pieces within reach of a child who is still exploring with their mouth. A sensory tray must always be used under direct adult supervision.
Sensory play for ages 3-6
Sensory play between the ages of 3 and 6 can include pouring, mixing, sorting and small tools. The child can now follow a simple sequence and take a more active part in tidying up.
Sensory play becomes more engaging when it involves a real action, such as filling a jug, sorting objects by texture or shaping clay. There is no need to add lots of colours or stimuli. You can also extend language with words such as rough, flexible, heavy, damp or textured.

How to set up a sensory table at home
Setting up this space requires a stable surface, a manageable container and a single play invitation. The goal is not to fill it with objects but to offer a clear choice that the child can repeat and tidy away.
- Define the purpose. Choose one action, such as pouring, sorting, mixing, kneading or describing.
- Secure the base. Use a low table or a large tray on the floor, away from cables and walkways.
- Limit the amount. Start with two containers and two or three related materials.
- Check for risks. Inspect pieces, edges, allergies, moisture and anything that could break.
- Finish with independence. Leave a cloth and a box so the child can take part in tidying up.
A well-prepared sensory table leaves room for movement and mistakes. If it is crowded with objects, the child moves from one stimulus to another without exploring deeply. Therefore, add materials only when the action has become easy.
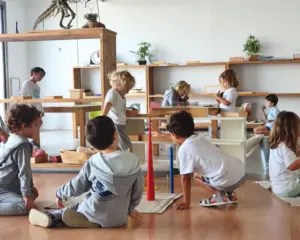
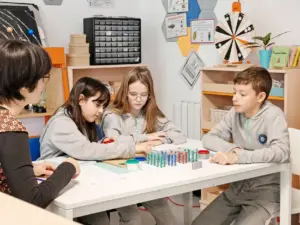
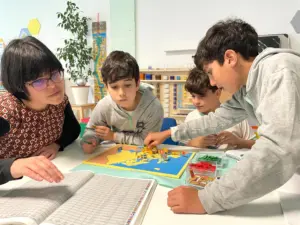
At IMS Sotogrande, bright classrooms and Montessori materials are part of an environment that respects each child’s pace. If you would like to see it in person, book a personalised school visit.

Sensory play activities: choose materials by goal
A sensory activity can build a particular skill when the material and action fit together. Choose the goal first, not the decoration.
To touch and describe, combine wood, cork, fabric, a sponge and a brush. For pouring, use containers, spoons, large tongs and water. To sort, offer objects with clear differences in size, texture or weight.
Sensory play works best when the adult observes what interests the child and adjusts the next step. If the adult changes the materials too soon, they interrupt the repetition that makes learning possible.
Sensory play invitation: from exploration to investigation
Sensory invitations change with age because children’s questions and skills change too. At 18 months, direct experience matters most. Later, an invitation can include comparison, recording and explanation.
From 0 to 3 years, prioritise grasping, pouring and emptying. From 3 to 6, add sorting, vocabulary and sequences. In Children’s House (Casa de Niños, 3-6), a child can investigate properties. In Elementary (Taller, 6-12), a sensory invitation can begin with soil, water, minerals or seeds to formulate hypotheses and document observations.
Common mistakes that reduce the value of play
The most common mistakes are offering too much, directing every step and overlooking safety. Comparing the child’s result with an adult model also takes away from the experience.
Do not turn exploration into a test. If the child rejects a texture, offer another way in, such as observing, using a tool or touching only part of it. If the child spills, support the repair without anger. Clean the materials after use and dry them before storing them to prevent dampness and unpleasant smells.
Frequently asked questions
Which materials are safe for sensory play?
Safe sensory-play materials are durable, washable and suitable for the child’s age, such as water, sponges, fabrics, large pieces of cork, spoons, containers, clay, large leaves or smooth stones of a safe size, with no sharp edges, toxic substances or pieces the child could put in their mouth.
For children under 3, avoid any small item and maintain direct supervision. Also, check for possible allergies before adding food or natural materials.
What age can children start?
Sensory play can begin in the first few months with simple, safe invitations, although a tray involving pouring and transferring is usually a better fit around 18 months, when a child can sit steadily, grasp objects and participate with constant adult supervision.
Before that age, use supported experiences, such as touching a fabric, squeezing a large sponge or moving water with their hands. Never leave loose materials beside a baby.
What if my child does not want to touch?
If a child rejects a texture, remove it without insisting and offer an alternative they can explore with a tool, such as a spoon, paintbrush or container, because independence also means deciding how to approach a new experience.
Observe whether the child prefers to look, listen or take part in another way. Also, present the texture in small amounts and respect their response.
Key takeaways
The quality of this invitation depends less on the objects than on the adult’s preparation. A few materials, a clear purpose and time to repeat turn exploration into an experience of learning and independence.
Start with water, two containers and a towel. Observe what your child does, adjust the difficulty and let them take part in tidying up.