How to Create a Montessori Play Space at Home: A Guide for Families

Have you ever walked into a Montessori classroom and felt like everything just fits? The materials are within the child‘s reach, the furniture is their size, and every object has a purpose. That order isn’t accidental, and the good news is you can create a Montessori play space at home without redecorating your entire house.
At IMS Sotogrande, we’ve been guiding families for years who want to bring the Montessori philosophy beyond the classroom. What works at school works at home too, because the principle is the same: trust the child and prepare an environment that invites them to act on their own. When it comes to Montessori play space at home, it pays to listen to what families and lead guides actually report.
Key Takeaways
- A Montessori home environment doesn’t require expensive materials: what matters is organization and proper sizing.
- Visual order helps a child concentrate and tidy up without adult help.
- Materials should be at the child’s eye level, on open shelves with only a few items visible at a time.
- Rotating materials every two weeks maintains interest without accumulating toys.
- A Montessori play space adapts by age: what works at 18 months won’t work at 5 years old.

What a Prepared Environment Really Means
Maria Montessori observed that young children seek to repeat activities that give them mastery. For that to happen, the environment must be accessible, orderly, and beautiful. This isn’t about Pinterest aesthetics. It’s about the child being able to act without asking for adult help every time they want a material. Daily practice with Montessori play space at home reveals nuances no handbook fully captures.
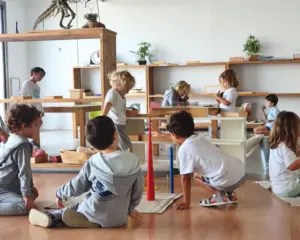
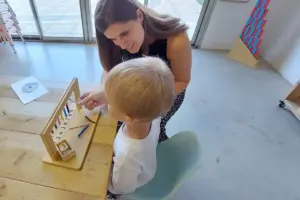
A prepared environment has three characteristics: materials are at their height, there’s a limited number of visible choices, and everything has a fixed place. When the child finishes, they return the material to the shelf and pick the next one. That cycle, which in a Montessori classroom we call a “work cycle,” can also exist in your living room. Understanding Montessori play space at home from inside the classroom reshapes everyday decisions.
Don’t confuse a prepared environment with an empty room. It’s about intention: every object there invites a specific action. A basket with three textured balls is worth more than an overflowing container of plastic.

Organization by Age: What Changes and What Stays the Same
A child’s needs change significantly between ages 0 and 6. What doesn’t change is the principle: accessibility, order, and independence. Here’s what to prioritize in each stage.
0 to 15 Months: The World at Floor Level
At this stage, the baby moves by rolling, crawling, or creeping. Their play space needs a soft surface (a firm mat or rug), a safe mirror propped against the wall, and a basket with 3 or 4 objects of different materials: wood, cloth, metal. Change the objects weekly. What the baby practices here is hand-eye coordination and sensory exploration, not “play” as we adults understand it.
15 Months to 3 Years: Imitation and Movement
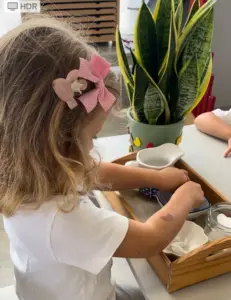
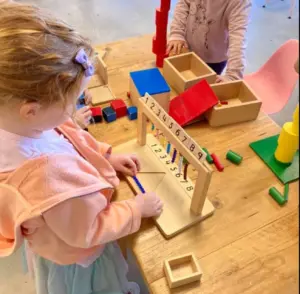
The child can now walk and wants to do everything you do. This is the time to include child-sized furniture: a low table and chair, a shelf with 4 or 5 activities organized on trays, and a low coat rack so they can hang their jacket. Typical activities include spoon transfers, screwing lids on, dressing frames, or wiping with a damp cloth. You don’t need to buy anything special: an Ikea tray, two bowls, and some lentils provide engagement for weeks.
3 to 6 Years: Concentration and Responsibility
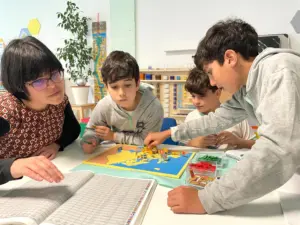
At this age, a child can sustain an activity for 20 or 30 minutes if it interests them. Expand the repertoire with practical life materials (pouring water, cutting a banana with a real knife, sweeping), accessible art (paints, clay, scissors), and a reading corner with cushions and a few visible books. The key is that each material has a single objective and the child can use it without constant supervision.
Book a personalized school visit to see how we organize Montessori environments at every stage.

Materials You Actually Need
The Montessori industry is full of beautiful, expensive products. The reality is that Maria Montessori designed her first materials with everyday objects. Here’s an honest list.
Essentials:
- Open shelves at the child’s height (Ikea’s Kallax series works well if you remove a shelf).
- Trays or baskets to group each activity.
- Small furniture: table, chair, coat rack, mirror.
- Real kitchen utensils: spoons, bowls, small pitcher, spreading knife.
- Few, accessible books, with covers facing out.
Useful but Not Essential:
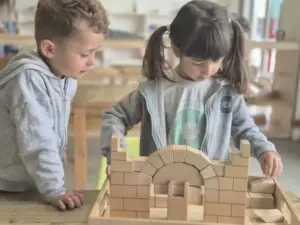
- Classic sensorial materials: pink tower, brown stair, cylinders. You can find them in Montessori material stores or make homemade versions with painted cardboard.
- Dressing frames (buttoning, zipping, tying). Fabric ones are more practical than wooden ones.
- Organized art materials: a caddy with colored pencils, a jar with brushes, a drawer with paper.
What You Don’t Need:
- “Educational” tablets for children under 3. Screens don’t develop fine motor skills or deep concentration.
- Battery-operated toys with lights and sounds. They stimulate noise, not attention.
- Mountains of toys. Less is more: with 6 to 8 well-chosen activities, a 3-year-old has enough for weeks.
Seven Common Mistakes We All Make
Even with the best intentions, it’s easy to fall into traps that ruin the prepared environment. These are the most frequent.
First, too many visible materials . If the shelf has 15 activities, the child doesn’t choose: they get overwhelmed and end up throwing everything on the floor. Put out 4 or 5 and store the rest in a closet.
Second, toys that are too difficult . If the child needs adult help to use it, it’s not a Montessori material: it’s a frustration. Each activity should be challenging but achievable with practice.
Third, not having a fixed place for everything . If materials end up in generic boxes, the child doesn’t know where to return them. Use photo labels for the youngest ones.
Fourth, tidying up for the child . When you clean up, you send the message that they aren’t capable. Better invite them: “Can you help me put the pieces in the tray?” and do it together the first few times.
Fifth, buying everything at once . Start with the basics, observe what your child uses, and expand based on their interest.
Sixth, ignoring movement . A Montessori space isn’t just shelves: it includes areas for jumping, climbing, and moving. If your home has a balcony or terrace, dedicate a corner to active play.
Seventh, expecting perfection . Your house isn’t going to look like a model school, and it doesn’t need to. What matters is that the child has the autonomy to choose, work, and clean up.
How to Maintain It Long-Term Without Going Crazy
The biggest challenge isn’t setting up the space, but maintaining it. Two habits make the difference.
The first is rotation . Every two weeks, remove two or three materials from the shelf and replace them with others you had stored. The child sees them as new and you regain their attention without buying anything.
The second is shared cleaning . Dedicate 5 minutes at the end of the day to tidy up together. Put on a song, do it calmly, and don’t correct every movement. Over time, the child will do it alone. At IMS, we see every day how 4-year-olds clean up their classroom without being asked: it’s the result of years of practice, not one day.
If you feel the space is getting out of control, simplify. Remove materials until order returns. It’s easier to add than to remove when chaos is already installed.
Frequently Asked Questions
At what age can I start with a Montessori space at home?
From birth. A newborn needs a safe space on the floor (never just in the crib or playpen) with a mirror and simple objects to observe. You don’t need special furniture: a firm mat and a basket with two or three objects are enough for the first months.
Do I need to buy original Montessori materials?
No. Classic materials like the pink tower or cylinders are useful, but you can start with everyday objects: kitchen bowls, trays, clothespins, jars with lids. The important thing is that each material has a single objective and the child can manipulate it independently.
How many materials should I put on the shelf?
Between 4 and 6 activities is the ideal number for a child aged 1 to 4. If you have more materials available, store them in a closet and rotate them every two weeks. An overloaded shelf causes distraction, not concentration.
Does a Montessori space work in small apartments?
Yes, and in fact it works better. A small space forces you to choose carefully what materials to put out and prevents accumulation. You can dedicate a corner of the living room or a wide hallway. You don’t need an entire room: a shelf, a small table, and a floor area to work is enough.
What do I do if my child doesn’t use the space I prepared?
First, observe: does the child choose, or are they directed? Make sure the materials are at their height and they can access them without asking for your help. If they still don’t use them, the activity probably doesn’t motivate them yet or is too difficult. Swap it for something simpler and observe again.
Key Takeaways
Creating a Montessori play space at home isn’t a renovation or an expense: it’s a decision to trust. You trust that your child can choose, concentrate, and clean up if you give them the right tools. Start with one shelf, four materials, and the willingness to observe what your child does, not what you expect them to do.
If you want to see how the Montessori philosophy is lived in a real environment, with authentic materials and certified AMI guides, we invite you to visit IMS Sotogrande. Book your visit here and discover how a prepared environment transforms the way your child learns and relates to the world.